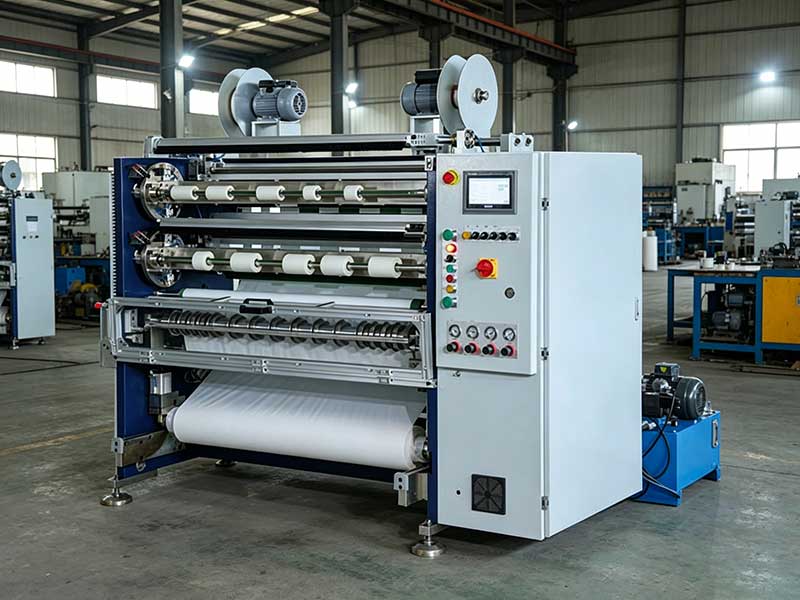
The single sided adhesive slitting machine is a commonly used device in industries such as packaging, printing, and electronics, used to cut large rolls of single sided adhesive into smaller rolls of the required width. Many people find it complicated for the first time, but once you master the core steps, you can get started smoothly in just three minutes. Below is a concise and practical guide.

1. Pre-boot check (30 seconds)
Before starting up the device, please quickly confirm the following points:
1. Power connection: Ensure the slitting machine's power cord is securely plugged in and the voltage is stable.
2. Blade condition: Check whether the circular or flat blades are sharp and free of damage, and whether the blade fixing screws are tightened.
3. Material installation: Attach the large roll of single sided adhesive onto the reel, tighten the fixing nut, and ensure the belt does not sway side to side.
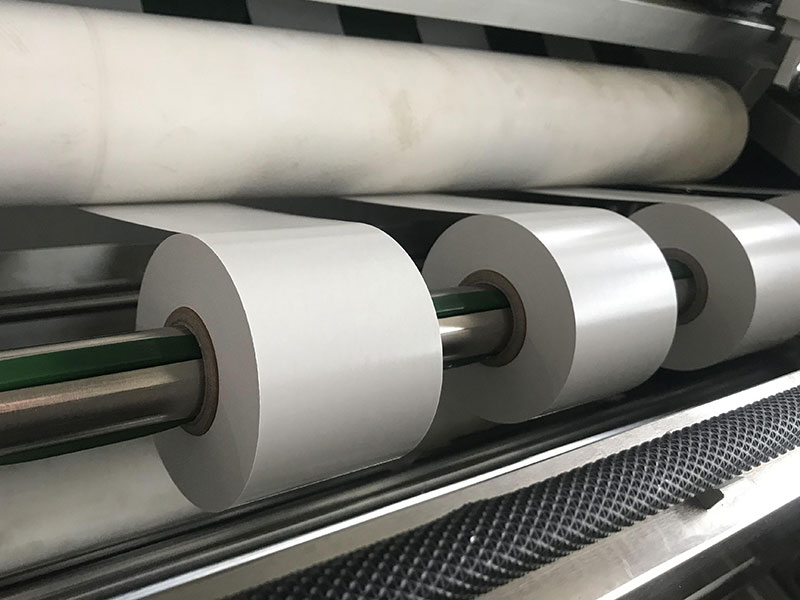
4. Rewinding reel: According to the required width of the finished product, fit the corresponding paper or plastic tube onto the reel and adjust the limit stop.
⚠️ Safety tip: Before operating, remove watches, rings, or other metal items. Tie up your long hair to avoid getting caught in the equipment.
2. Parameter Settings (1 minute)
Slitting machine panels may vary slightly between brands, but the core parameters are basically the same:
1. Slitting width: According to order requirements, move the tool holder to the corresponding scale position. Common equipment uses a slide-rail tool holder. Release the locking handle and push it to the specified width before locking.
2. Slitting speed: Beginners are advised to start at a low speed (e.g., 10-20 meters per minute) and gradually increase once familiar. Too fast speed can easily cause the adhesive to deviate or curl at the edges.
3. Tension adjustment: single sided adhesive is relatively thin, so the tension when unwinding should not be too high. The belt should be spread flat and not loose. The winding tension is finely adjusted according to the finished product's compaction, generally set within the range of 2-4 kilograms.

3. Film Penetration and Debugging (1 minute)
1. Film penetration path: pull out the adhesive tip, sequentially bypass the guide roller, tension roller, and slitting blade, and finally fix it onto the paper tube of the reel. Always follow the guide roller direction diagram on the equipment to avoid belt twisting.
2. Edge alignment calibration: Start the equipment and run it slowly for a few seconds to observe whether the adhesive edges align with the blades. If misalignment occurs, make fine adjustments to the left and right positions of the reel or the angle of the guide roller.
3. Waste Edge Treatment: The waste edges on both sides generated by slitting will automatically be wound into the waste edge reel, ensuring the waste edges are tightly wound and do not scatter or affect operation.
4. Formal Splitting and Monitoring (30 seconds)
After confirming everything is normal:
1. Gradually increase the speed to normal production value (usually 20-40 meters per minute).
2. Stand on the front side of the equipment and observe whether the adhesive cutting edges are neat and whether there are any sticking or burrs.
3. Check the winding end face every 5-10 minutes to ensure it is flat, and adjust tension or blade pressure promptly.
5. Common Issues and Quick Resolution
| Problematic phenomena | Possible reasons | 3-second solution |
| The tape went off | The scroll was placed but missed | Stop the machine, loosen the fixing nut, and make fine adjustments to roll the tape in the opposite direction |
| The cut is rough | The blade becomes dull | Replace with a new blade or rotate the circular blade using an unworn edge |
| Curl and wrinkle | Excessive tension during rewinding | Reduce the winding tension by 0.5 kg each time |
| Inaccurate width dimensions | The tool holder is not locked after moving | Recalibrate the tool position with a steel ruler and tighten the handle |
6. Finishing Work (Quick Completion)
After slitting is complete:
1. Stop the machine and cut off the power.
2. Remove the finished roll and use a utility knife to cut the adhesive connection.
3. Use an air gun or brush to clean off glue debris and dust from the knife holder and guide roller.
4. Keep daily output records to provide reference for the next production.
Summary
The operation of the single sided adhesive slitting machine is not mysterious: first check, then adjust the blade, then align, test slowly, and gradually increase speed. By following these steps, even new employees can independently complete the entire process from preparation to the first roll of finished product in under 3 minutes. Of course, once proficient, you can flexibly adjust tension and speed according to different adhesive materials (such as low-tack, high-tacki, colored adhesive) to achieve better slitting results.
Remember: safety first, feel second, speed third. Wishing you smooth operation!
The following analysis covers three aspects: equipment hardware, material characteristics, and process parameters, hoping to provide you with a useful reference.
06. July, 2026
it is a specialized machine that precisely "breaks down wide-width tape rolls" into small finished rolls of narrow specifications to meet our requirements.
01. July, 2026Scientific preventive maintenance is the fundamental guarantee for extending equipment lifespan and stabilizing product pass rates.
23. June, 2026Uneven winding, edge burrs, and abnormal operating noises are the three major problems troubling frontline operators.
15. June, 2026Faced with the dazzling array of slitting machine models and brands on the market, how can you choose the one that best suits your production needs?
11. June, 2026


